
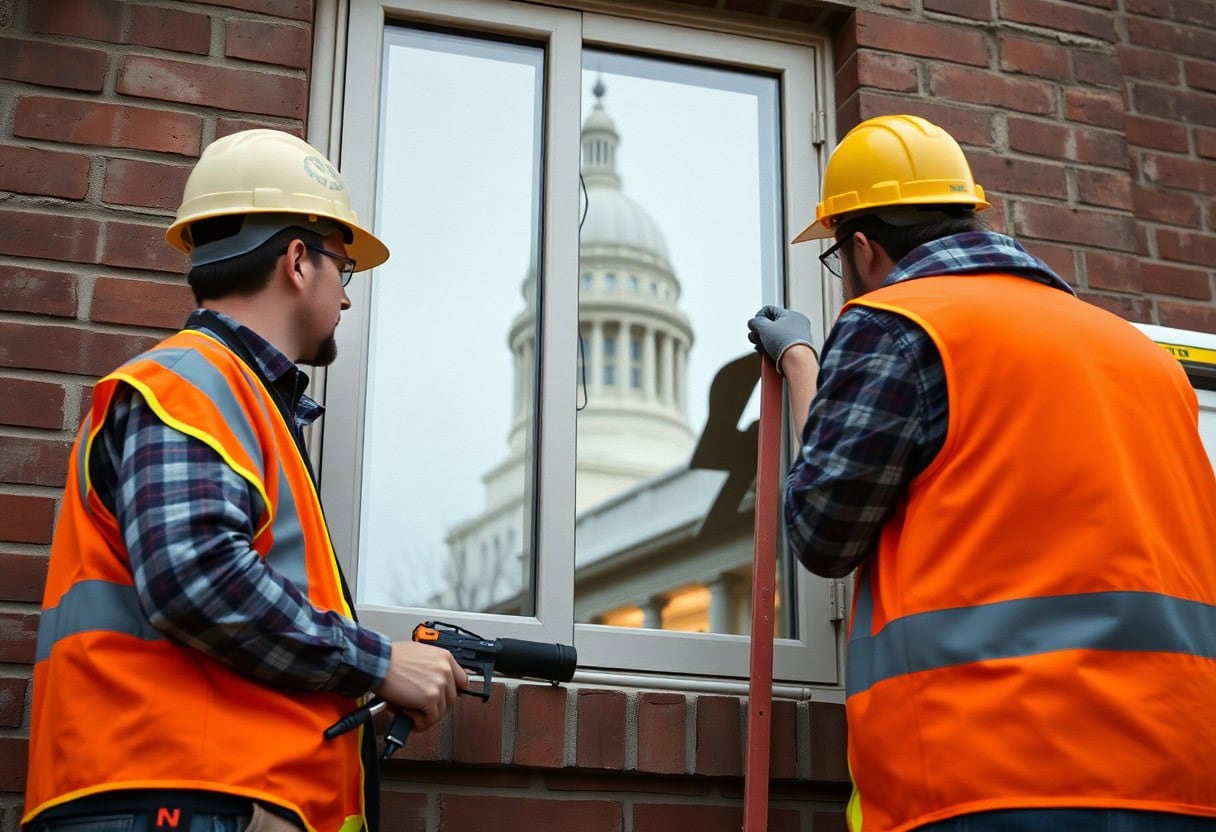
There’s more to window replacement in Lincoln than curb appeal; when you hire a professional, you ensure proper sealing against harsh Midwestern weather, optimized energy efficiency that lowers your bills, compliance with local codes, and preserved manufacturer warranties so your investment performs reliably for years.
Key Takeaways:
- Improved energy efficiency and lower utility bills in Lincoln’s hot summers and cold winters by ensuring proper fit, sealing, and insulation.
- Greater resistance to Nebraska weather-wind, hail, and freeze‑thaw cycles-reducing air and water infiltration and extending window lifespan.
- Correct installation preserves manufacturer warranties, meets local building codes, increases resale value, and minimizes long‑term maintenance and repair costs.
The Importance of Proper Window Installation
Proper installation determines whether the performance ratings printed on your window labels actually translate into lower bills and a drier, quieter home. If your windows are out of square, improperly shimmed, or lack correctly applied flashing, you’ll see drafts, uneven temperatures, and water intrusion long before the glass or frames reach their expected lifespan; studies show windows account for roughly 25-30% of a home’s heat loss, so poor workmanship directly undermines that area of energy performance.
Manufacturers commonly require certified installation to keep warranties valid, so if your installer cuts corners you may be left paying for repairs or replacements that would otherwise be covered. You also lose the benefit of integrated solutions-correct sill angles, continuous air and vapor barriers, and pressure-equalized cladding-that professionals install to prevent condensation, rot, and hidden structural damage that becomes costly to repair later.
Energy Efficiency and Cost Savings
When you combine high-performance products (double- or triple-pane glass, low‑E coatings, argon/krypton fills) with airtight, correctly flashed installation, the U‑factor and SHGC values manufacturers publish actually reduce your heating and cooling load. Energy Star estimates replacing single‑pane windows with ENERGY STAR-qualified windows can save homeowners roughly $100-$600 per year depending on climate; in Nebraska’s colder winters, the savings trend toward the higher end of that range due to reduced heat loss through glass and frames.
Beyond product choice, installation quality changes outcomes: poor sealing and thermal bridging can negate 10-20% or more of a window’s rated efficiency, so you won’t realize full energy savings with DIY or inexperienced installers. If you track payback, many homeowners recovering installation and product costs through lower utility bills typically see meaningful returns within about 5-10 years, and you’ll notice more immediate benefits in thermostat stability and reduced HVAC cycling.
Enhancing Home Value and Curb Appeal
Replacing windows is one of the highest‑value exterior projects you can do: Remodeling Magazine’s Cost vs. Value reports routinely place window replacement among projects with strong resale returns (often in the mid‑60s to low‑70s percent range of cost recouped). A professionally installed set of new windows gives your home a cleaner, more modern face from the street, and buyers consistently list energy efficiency and fresh exterior finishes among top priorities when comparing properties.
Professional fit and finish matter to appraisers and buyers: consistent sightlines, uniform trim, and properly integrated exterior flashing avoid the “half‑done” look that can lower perceived value. You’ll also prevent interior cosmetic damage-misaligned sashes, scratched drywall, or uneven casing-that can turn shoppers away or trigger lower offers during inspections.
Additionally, you gain design flexibility that supports resale: matching grille patterns, frame colors, and historic proportions can preserve neighborhood character and attract targeted buyers (for example, keeping prairie‑style grids on a 1920s Lincoln bungalow maintains authenticity and prevents the small devaluation that comes with mismatched replacements), and transferable manufacturer warranties and installation documentation make your listing stronger in the eyes of both appraisers and agents.
Common Mistakes in DIY Window Installation
Poor Sealing and Insulation
You can create persistent air and water leaks by skipping proper flashing, backer rod, and the correct sealant sequence; windows are responsible for roughly 25-30% of a home’s heating and cooling losses, so even small gaps matter in Lincoln’s cold winters. Using high-expansion foam around a vinyl frame, for example, often bows the frame and prevents a tight sash seal, while using exterior-grade caulk on interior joints or vice versa leads to premature failure when materials expand and contract with temperature swings.
Failing to integrate the window with the house weather-resistive barrier (WRB) and to install a pan or sill flashing commonly results in water intrusion and framing rot within one to three seasons. You should use low-expansion, closed-cell insulating foam for perimeter gaps (typically filling a 1/4″-3/8″ shim space), back it with a compressible backer rod where needed, and apply manufacturer-recommended flashing tape and a high-quality polyurethane or silicone exterior sealant to keep warranties intact and avoid mold and structural repairs.
Incorrect Measurements and Sizing
You often get the wrong replacement when you measure only the visible sash instead of the rough opening; that leads to ordering a unit that’s too small (causing gaps and drafts) or too large (requiring costly reframing). Best practice is to allow a 1/4″-3/8″ clearance per side for shims and insulation-ordering a “36×24” unit for an opening that measures 35 7/8″×23 3/4″ will cause installation problems and can void manufacturer fit-related warranties.
Measure width at the top, middle and bottom and record the smallest; then measure height at left, center and right and use the smallest-also check diagonals to confirm the opening is square within about 1/8″. For new-construction orders, provide rough opening dimensions (stud-to-stud) and specify jamb depth; for retrofit or pocket replacements, state whether you’re measuring to the existing frame or removing it entirely so the manufacturer can recommend the correct unit type.
Choosing the Right Professional Installer
When you vet installers, prioritize those who can demonstrate local experience with Lincoln’s freeze-thaw cycle, prevailing winds, and building codes; installers familiar with Lancaster County permitting and ice-damming prevention will avoid common winter-related failures. Ask for a clear written scope that specifies flashing details, insulation R-values, low-E coating orientation, and expected timelines-companies that routinely complete 200-500 installs per year will usually have streamlined processes and fewer surprises.
Demand written warranties that separate product and labor coverage (typical labor warranties run 1-10 years) and verify who handles warranty claims if a window fails after installation. If your home was built before 1978, confirm the crew holds EPA Lead-Safe certification and that the contractor carries general liability and workers’ comp insurance limits you approve.
Credentials and Experience
Check for manufacturer certifications (examples: Andersen, Pella, Marvin certified installers), AAMA installation certification, and ENERGY STAR dealer status-these verify training on specific product systems and performance installations. Prefer installers with at least 3-5 years in the business and a portfolio showing installations similar to yours (same window type, same style of home); a company that can produce 50-100 recent, documented local jobs gives you more evidence of repeatable quality.
Also confirm on-the-job details: ask how crews handle sill flashing, backer rod and sealant selection, and insulating the jambs to achieve target U-factor and SHGC values. Experienced teams will provide before/after measurements, thermal camera images on request, and a documented install checklist that you can review before sign-off.
References and Reviews
Request three local references for projects completed in the last 12-24 months and call them to ask about timeline adherence, cleanup, and whether the installed windows met promised energy or comfort improvements-many homeowners report 10-20% reductions in heating/cooling energy after upgrading to properly installed ENERGY STAR windows. Look for specifics: did the crew repair or replace damaged trim, how long did caulk and sealant hold up, and were any callbacks handled promptly?
Scan online reviews on Google, BBB, and trade sites (Angi, Houzz) for patterns: consistent praise for attention to flashing and minimal call-backs is a positive sign, while recurring complaints about missed start dates or water intrusion are red flags. Evaluate how the company responds to negative feedback-prompt, professional responses that offer remediation indicate they stand behind their work.
Verify reviews by asking for project addresses so you can inspect work in person or request time-stamped photos of critical details (flashing, interior trim, and thermal scans). Cross-check permits at the Lincoln Building and Safety Department to confirm work was permitted and finaled, and get warranty paperwork in writing before you pay final invoices.
Understanding Window Types and Materials
When deciding on windows for Lincoln’s seasonal swings, you should compare frame materials and glazing systems by their measured performance: U-factors, SHGC, and visible transmittance. Vinyl frames are common and typically deliver U-factors in the 0.28-0.35 range for double-pane units; fiberglass and wood-clad options can push that lower while offering better dimensional stability and finish options. Triple-pane assemblies, often with two low-E coatings and argon or krypton fill, commonly achieve U-factors between 0.18 and 0.25, which matters when you want to reduce heating costs in extended cold snaps.
Pay attention to spacer type and edge seals as well – warm-edge spacers cut condensation risk and increase center-of-glass R-value, while high-quality silicone or butyl seals extend service life beyond 20 years in many cases. You should expect an NFRC label on any reputable product showing tested U-factor and SHGC; use those numbers to compare packages rather than marketing claims, and prioritize assemblies with tested results that match your performance goals.
| Vinyl | Low maintenance, low cost ($300-$700 installed typical), U-factor ~0.28-0.35 for double-pane; good thermal break but limited paint/finish options. |
| Wood / Wood-Clad | High insulation and aesthetics, higher upfront cost ($600-$1,200+), requires finish/maintenance unless clad in aluminum or vinyl; U-factor can be ≤0.30 with proper glazing. |
| Fiberglass | Very stable in freeze-thaw cycles, low expansion (better long-term seal performance), mid-to-high cost, often matches wood in appearance with U-factor 0.25-0.30 for double-pane. |
| Aluminum / Metal | Thin profiles and strength for large openings, traditionally poor thermal performance unless thermally broken; cost varies, often paired with thermal breaks and high-performance glazing to reach U-factor targets. |
| Composite (Engineered) | Combines materials to balance cost, durability, and appearance; often designed to match local climate needs with warranties and U-factors competitive with fiberglass/wood-clad options. |
- Match glazing (double vs triple) to the room use and exposure – bedrooms and north façades typically benefit most from better U-factors.
- Choose spacer and fill (argon ≈10% improvement, krypton for tight glazing) based on window thickness and thermal goals.
- Factor in maintenance: vinyl/fiberglass requires minimal upkeep; wood needs periodic refinishing unless clad.
Options Available in Lincoln, NE
Local suppliers typically stock Energy Star-rated double- and triple-pane options with low-E coatings suited to Nebraska’s mixed-humid/cold tendencies; you can often get double-pane low-E argon units for $400-$900 installed, while triple-pane packages commonly start near $700 and can run $1,200 or more depending on frame and glass choices. You should ask suppliers for NFRC label copies and examples of local installations to verify performance under Lincoln’s freeze-thaw cycles and occasional high winds.
Several installers offer factory pre-finished wood-clad or fiberglass units for historic homes or high-exposure facades; these options reduce on-site finishing time and lower the risk of installation-related moisture problems. You should also request written estimates that separate product, glazing package, and labor so you can compare long-term value – for example, a $300 premium for triple-pane now may pay back in 5-10 years on heating bills for north-facing rooms.
Benefits of Different Materials
Vinyl saves you money up front and minimizes maintenance: expect decades of service without painting, and good manufacturers back frames with 20-30 year warranties. You should choose vinyl for standard openings where cost and ease-of-replacement matter, but avoid it for oversized units or where paintable finishes are required.
Wood and wood-clad windows give you better on-site tunability and a higher finished look; they also insulate well and can be repaired more easily after minor damage. Fiberglass combines low maintenance with low thermal expansion, which keeps seals and insulated glass units aligned through temperature swings that are common in Lincoln; in side-by-side field trials, fiberglass frames showed 30-50% less dimensional change than aluminum over seasonal cycles.
Thou should prioritize material choices that align with your performance goals, orientation, and maintenance tolerance while insisting on NFRC-labeled assemblies and installer warranties that cover both frames and sealed units.
The Installation Process Explained
You’ll notice the install is a methodical sequence rather than a quick swap: pros begin with a full site assessment, then move to removal, rough‑opening prep, flashing and sealing, setting and fastening the new unit, insulating gaps, and finishing the interior and exterior trims. Typical experienced crews in Lincoln complete a retrofit window in roughly 2-4 hours per opening (new construction installs take longer), and you should expect crews of two installers for standard single‑family homes to keep work efficient and consistent.
Project timing depends on lead times and permitting: custom units often take 2-6 weeks from order to delivery, and you’ll want to confirm any local permit requirements with Lincoln’s building department before work begins. Measurements are taken to the nearest 1/16 inch and recorded on a shop drawing, so your installer can avoid fit problems that cause air leaks or water intrusion later.
Pre-Installation Considerations
You should have the installer inspect the rough opening for rot, insect damage, or bowed framing before finalizing the order; visible decay that extends past the jamb or into the sheathing typically requires repair or sistering of framing members prior to installation. Also ask for a written plan showing whether the job is full‑frame replacement (remove siding and trim) or a retrofit insert, since the method changes flashing details, labor hours, and the water‑management strategy.
Window performance selections matter for Nebraska’s climate: aim for a U‑factor near 0.27 or lower and low‑E coatings appropriate for your home’s solar exposure-double‑pane low‑E can be acceptable, but many homeowners opt for triple‑pane units when noise reduction and winter performance are priorities. You’ll also want to confirm sightline, operation type (casement vs. double‑hung) and hardware finish up front; changes after fabrication can add weeks and cost.
Steps Involved in Professional Installation
Pros start by carefully removing the existing window and inspecting the rough opening, then install a sealed sill pan and self‑adhered flashing that laps at least 4 inches onto the substrate to direct water away from the wall. Next they set the new unit plumb and level, shim every 12 inches (more at jambs and corners), and fasten according to the manufacturer’s schedule-typically screws that penetrate at least 2.5 inches into solid framing at intervals of 6-12 inches depending on wind ratings.
After anchoring, installers apply low‑expansion spray foam sparingly to avoid frame distortion, compressible backer rod at larger gaps, and a continuous exterior bead of low‑modulus silicone or compatible sealant on the nailing flange or trim edge. Final steps include reinstalling interior trim, caulking, painting touch‑ups, debris removal, and an operation and water test to confirm proper drainage and smooth sash movement.
In addition, you should receive warranty registration and a post‑install checklist: the crew should run the sash through at least five open/close cycles, perform a 10-15 minute water test at the head to check flashings, and hand you maintenance guidance-recaulk intervals, hardware lubrication, and how to spot early signs of seal failure so you can protect your investment over the next decade.
Maintenance and Care After Installation
Once the crew has completed the job, you should adopt a simple maintenance routine to protect the performance and warranty of your new windows. Inspect hardware, seals and caulking every six months-spring and fall are ideal-and after any major storm; small gaps in caulk larger than about 1/8″ or visible water staining at the jamb demand prompt attention. High-quality vinyl units typically perform well for 20-40 years with minimal work, while painted wood frames often need touch-ups every 3-7 years to prevent rot, so plan maintenance intervals according to your frame material.
Use gentle cleaning methods to avoid damaging finishes or glazing: a solution of mild dish soap and warm water with a soft cloth or squeegee will remove most dirt, while abrasive pads and solvent-based cleaners can strip coatings or harm IGU spacers. Lubricate locks and moving parts with a silicone spray once or twice a year, and clear sill tracks and weep holes of debris after heavy pollen or spring storms to preserve drainage and smooth operation.
Routine Inspections
You should check seals, weatherstripping and interior glazing lines at least twice annually, documenting any changes with photos and dates so you can track deterioration over time. Verify that weep holes are open-use a soft, flexible brush to clear buildup rather than forcing rigid tools-and test sash operation: a properly balanced double-hung should move smoothly and stay open without drifting; if you notice a sash that slips or binds, note the problem for service.
Pay attention to condensation patterns: transient surface condensation on cold mornings is normal, but persistent moisture between panes signals IGU seal failure. When measuring gaps or misalignment, use a small ruler-frame movement or sash gaps exceeding about 1/4″ indicate structural or installation issues that warrant professional evaluation rather than DIY adjustments.
Addressing Common Issues
Fogging between panes, failing weatherstripping, loose hardware and cracked exterior caulk are the most frequent post-installation complaints. If you detect interior fogging, gather installation paperwork and warranty info immediately-many insulated glass unit (IGU) warranties run 10-20 years and the manufacturer often replaces failed units under warranty. For small exterior caulk cracks under 1/8″, you can remove the failed bead and re-caulk with a high-quality exterior silicone; larger gaps or continuous leaks require a pro to assess flashing and substrate damage.
Operational problems such as sticky tracks or failing balance systems often respond to a methodical cleaning and lubrication: vacuum tracks, flush with water to remove grit, then apply silicone lubricant to rollers and locking hardware. Balance systems in heavy-use homes commonly degrade after 15-20 years; when hardware is worn or parts are corroded, keep the original part numbers so your installer can source correct replacements that preserve fit and warranty coverage.
For a practical example, a Lincoln homeowner reported IGU fogging after eight years; because they had retained the installation invoice and photographed the issue, the installer documented the failure and obtained a warranty replacement of the sealed unit within three weeks. You should adopt the same approach: file claims promptly, keep all receipts and photos, and compare costs if the unit is out of warranty-IGU replacement typically ranges from roughly 25-50% of a full window replacement, so sometimes replacing the entire sash or unit is the better long‑term investment.
To wrap up
With this in mind, hiring a professional for window installation in Lincoln helps you protect your investment and improve comfort year-round. Professionals deliver precise measurements, correct flashing and sealing, and product choices tailored to Lincoln’s hot summers, cold winters, and occasional severe weather, so your windows minimize drafts, condensation, and energy loss while lasting longer.
When your installer follows local codes, handles permits, and provides manufacturer-backed warranties, you avoid costly rework and preserve your home’s resale value. By relying on experienced technicians, you get predictable performance, improved energy efficiency, and confidence that your windows will stand up to Lincoln’s seasonal extremes.
FAQ
Q: Why does professional window installation matter in Lincoln, NE?
A: Professional installation ensures windows perform as designed in Lincoln’s seasonal extremes. Proper measurement, framing, flashing and insulation prevent air and water infiltration that can reduce comfort, increase utility bills and cause structural damage. Certified installers follow manufacturer procedures so glazing, seals and moving parts function correctly over time.
Q: How does Lincoln’s climate influence the need for expert installation?
A: Lincoln experiences hot, humid summers and cold, snowy winters with freeze-thaw cycles and occasional high winds. These conditions demand precise installation techniques-correct flashing, thermal breaks, and drainage paths-to manage moisture, prevent seal failure and limit thermal bridging. Proper installation also reduces condensation and prevents rot or mold that can develop when moisture is allowed into wall assemblies.
Q: What energy and comfort benefits come from professional window installation?
A: When windows are installed correctly they minimize air leakage and thermal loss at the framing interface, maximizing the value of insulated frames, low-E coatings and gas fills. That translates to more consistent indoor temperatures, fewer drafts, and lower heating and cooling loads. Over time this can reduce utility bills and improve indoor comfort compared with windows that are poorly sealed or misaligned.
Q: Can improper installation affect warranties or product performance?
A: Yes. Many manufacturers require installation by trained or certified installers as a condition of their warranty. Improper handling, incorrect flashing, or failure to follow specified installation steps can void coverage for seal failure, frame warping or glass breakage. Professional installers provide documentation and follow manufacturer guidelines to protect warranty rights.
Q: Are there code, safety or permit considerations specific to Lincoln for window replacement?
A: Window projects can trigger building code requirements such as egress size for bedrooms, tempered glass in hazardous locations, and proper ventilation. Local permits may be needed for structural changes or sash replacements that affect openings. Historic district properties can have additional design review. A knowledgeable installer will identify permit needs, comply with local codes and recommend appropriate safety glass where required.
Q: How does professional installation affect resale value and inspection outcomes?
A: Professionally installed windows improve curb appeal, operate reliably and often come with transferable warranties-attributes that appraisers and buyers value. During inspections, correctly flashed and sealed windows reduce red flags like water intrusion, rot or inefficient performance. Documentation of energy ratings and installation details can support a higher perceived property value.
Q: What should homeowners in Lincoln look for when choosing a window installer?
A: Prioritize licensed and insured contractors with local experience, manufacturer certifications, references from Lincoln-area projects and a portfolio showing quality detail work. Request written estimates that specify materials, installation methods, warranty terms and timelines. Verify they perform on-site measurements, follow code and provide post-installation inspection and cleanup. Ask about energy-efficiency options and whether they handle permits and any necessary inspections.